Invisalign Case Study – What to expect
If you’re considering Invisalign treatment, this case study will explain the steps involved and talk you through the process. All of these photographs are of an actual patient treated by our Invisalign accredited dentist Dr Stephen Chan.
Invisalign treatment completed at Dental Quarters by Dr Stephen Chan.
STEP 1
The first step in the process is to have a consultation to discuss your suitability for Invisalign treatment. Whilst most people are suitable candidates, there is a small minority who can’t have Invisalign treatment. As everybody is different, it is best to discuss this with an Invisalign accredited dentist. They will do a number of checks and assessments of your bite, and what problems you would like fixed by the treatment. It is also important and highly recommended to have had a dental checkup, x-rays and scale and clean within the last 6 months. If you need any treatment such as fillings, crowns, bridges or veneers, you may need to have some of it completed prior to starting your Invisalign treatment.
STEP 2
Once you have asked all the necessary questions, have been provided with all information including what to expect and cost, you are ready to embark on your journey. If you are keen to start, you will need to have the following preparatory work done:
- Photos of your face, photos of your teeth (5 different angles)
- A full mouth x-ray or OPG
- 3D intra-oral scan to record how your teeth look before you start treatment
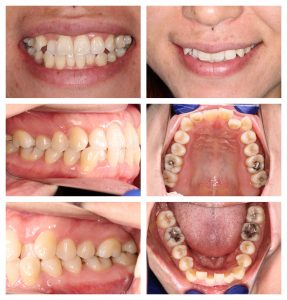
Example of preparatory photos to start Invisalign treatment
STEP 3
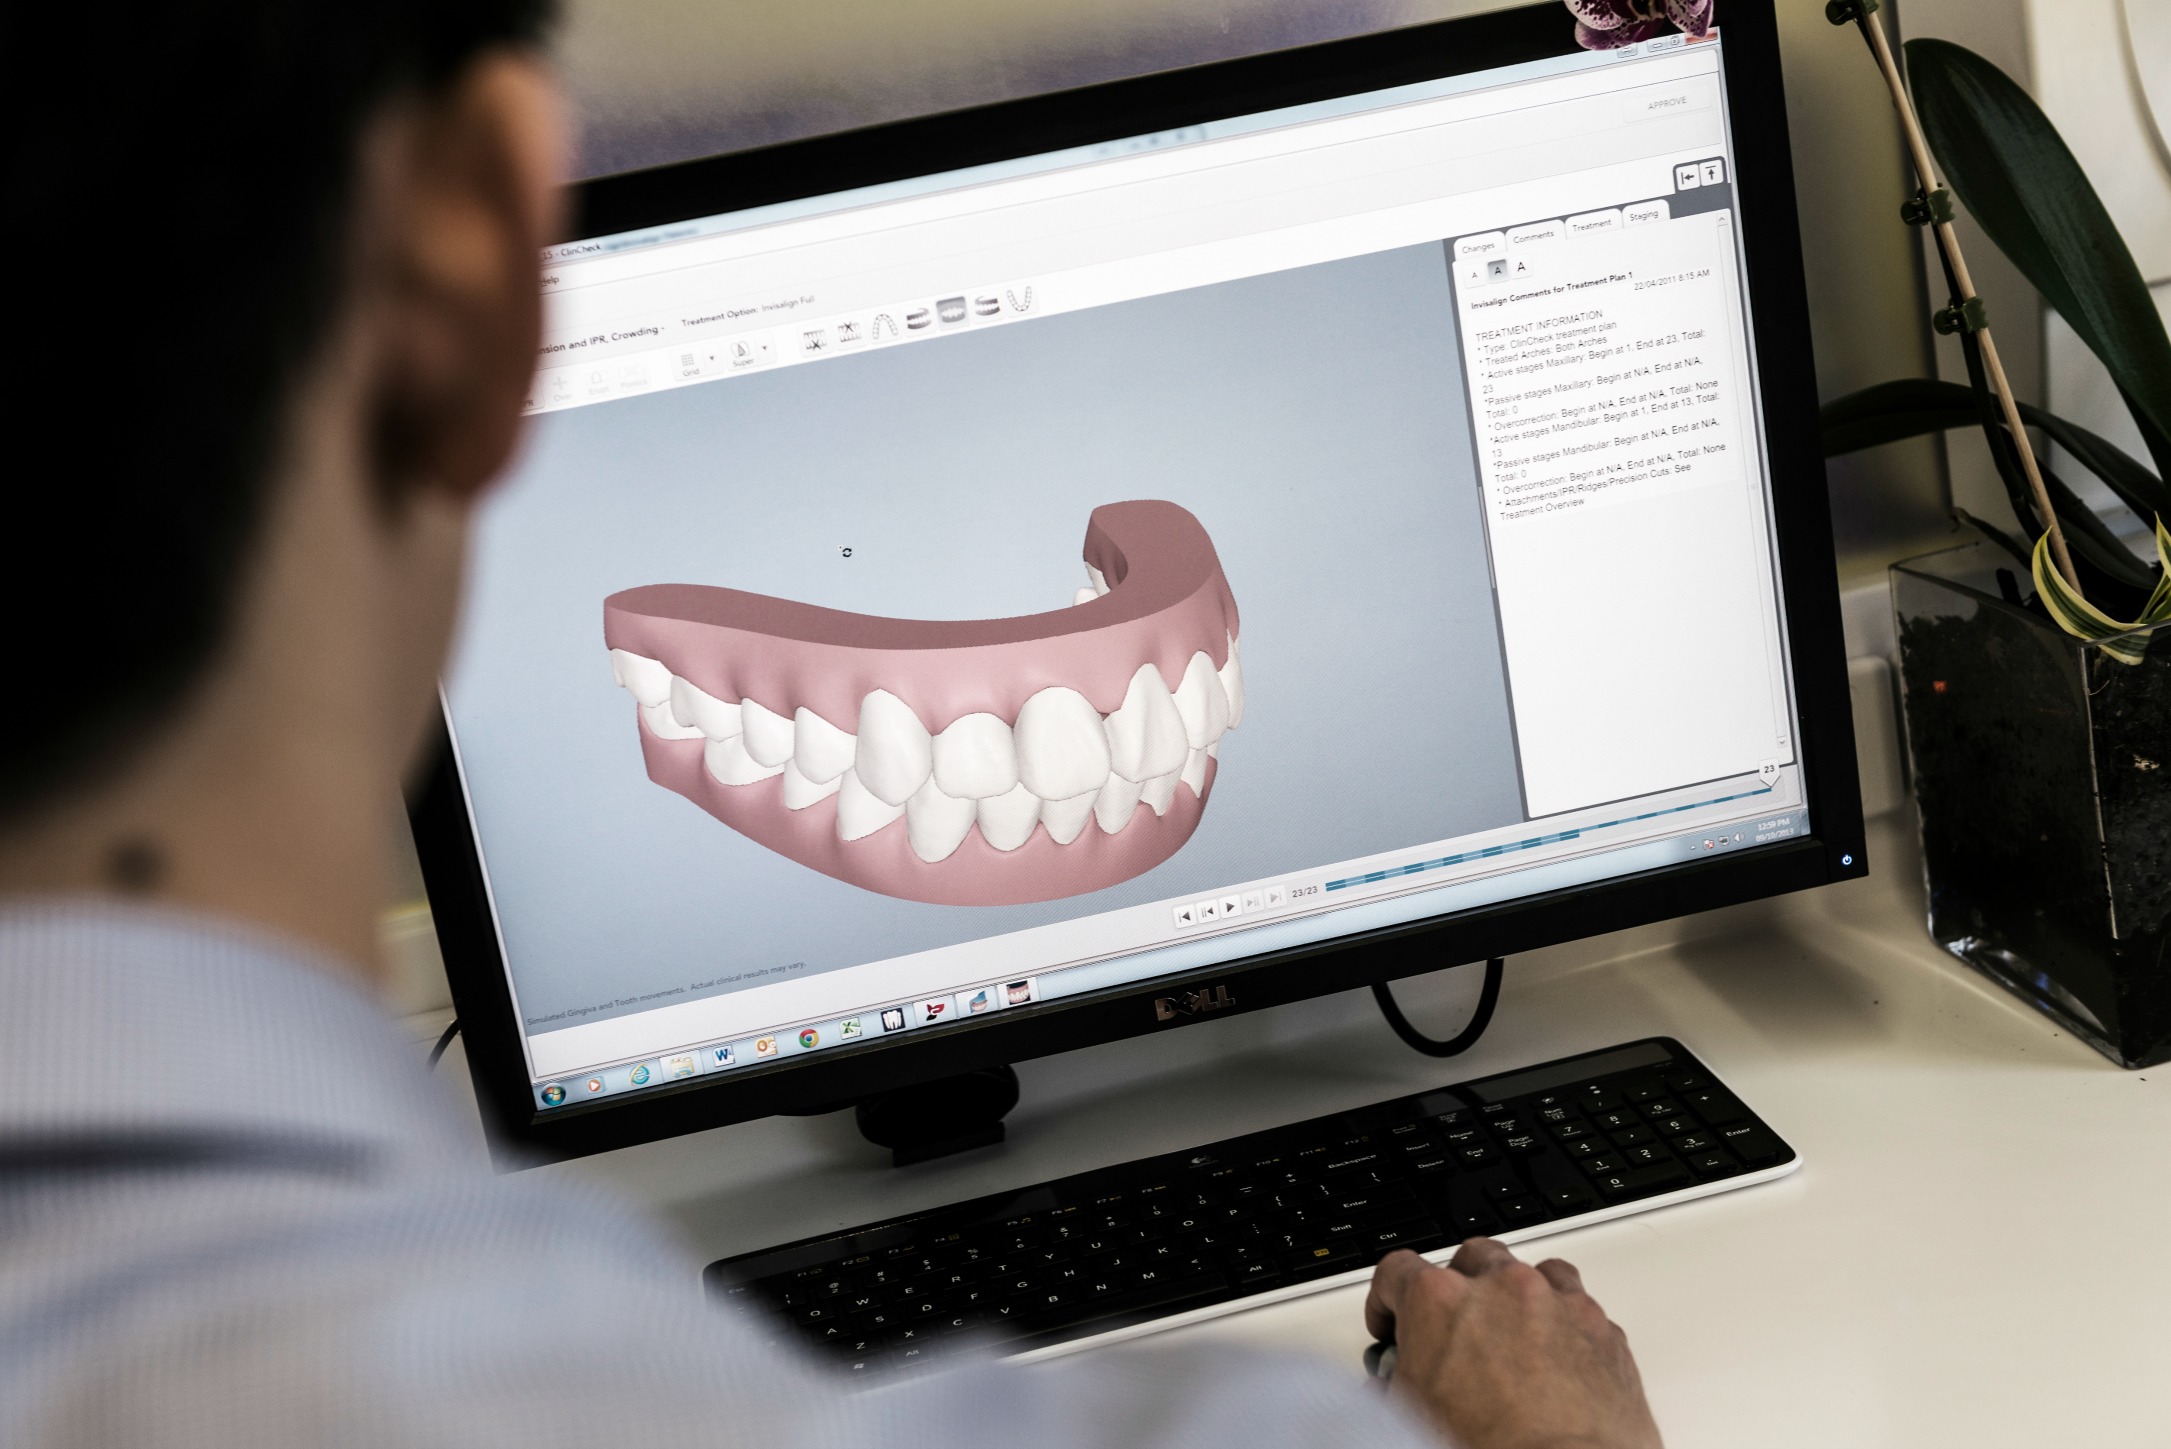
From the prep work done previously, we would normally see you in 2-3 weeks. We would then have photos and a video sequence showing you how your teeth will move gradually as the treatment progresses, and what your teeth will look like at the end. You can find out how long your treatment will take and what other details will be necessary for your treatment. We can discuss any changes you want to make and all the details of what you can expect.
In the case of our patient, her treatment was on the more complex side. She had 55 aligners to correct the upper teeth, and 53 to correct the lower teeth. This put her treatment time at close to the 2 year mark. It’s important to note that treatment time will vary significantly between people, and is completely dependent on the severity of the problems being corrected. In this case, the patient had to have teeth removed, so this would take longer due to having to close the spaces left behind. On average, most treatment takes 12-18 months.

Here are the computer-generated photos of our patient prior to starting treatment. The pink shapes on the teeth are the attachments which are used to help facilitate the teeth to move correctly.

Projected end result expected through Invisalign treatment.
STEP 4
Once you are happy with your treatment plan, we then go ahead to have your aligners made. This process takes approximately 4-6 weeks.
Once we receive your aligners, you can start. We recommend at the first appointment taking things slowly, and just getting used to putting the aligners in and taking then out. At first, even doing this can be daunting and feel very strange, but we are amazed at how quickly our patients get the hang of it.
STEP 5
If you have attachments as part of your treatment plan, we will need to see you in the next 2 weeks to attach them. They are tooth-coloured so they aren’t very visible and don’t take long to put on. They are removed at completion of your treatment.
We then see you every 6 weeks to check on your progress, help you out with any questions you might have and also do any individualised parts of the treatment you may require.
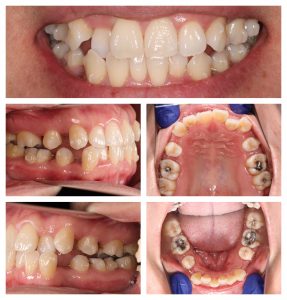
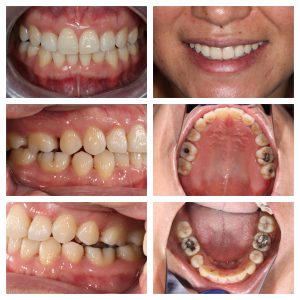
Photos of our patient from mid-way through her treatment. The attachments can be seen on her teeth, planned teeth have been removed, and spaces are starting to close.
STEP 6
When you get to the last aligner (well done!), we then see you to assess your smile. If you find that some of your teeth haven’t moved quite enough, don’t stress! You can still have a refinement done, which is basically extra aligners to correct any issues that might still remain. We don’t find most of our patients need this, but it’s good to have it in case. Our dentists are also big perfectionists, so they like to make sure the end result is perfect for our patients.
If you don’t need refinement, we would then go ahead and make retainers for you to wear to keep your teeth beautiful and straight!
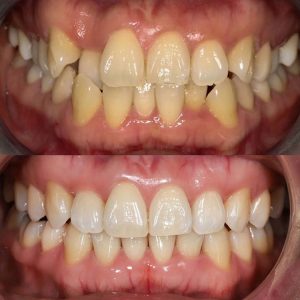
Here’s the end result for our patient. When you look back on the computer generated end result, it’s hard to tell the difference!
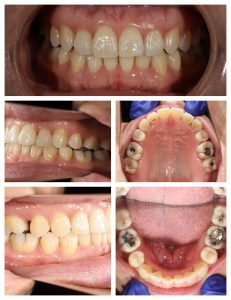
Our patient still going strong after 2 years post-treatment.
Do you have questions regarding Invisalign? All Invisalign consultations are free, so call us on 6143 5655 or click here to book online now.